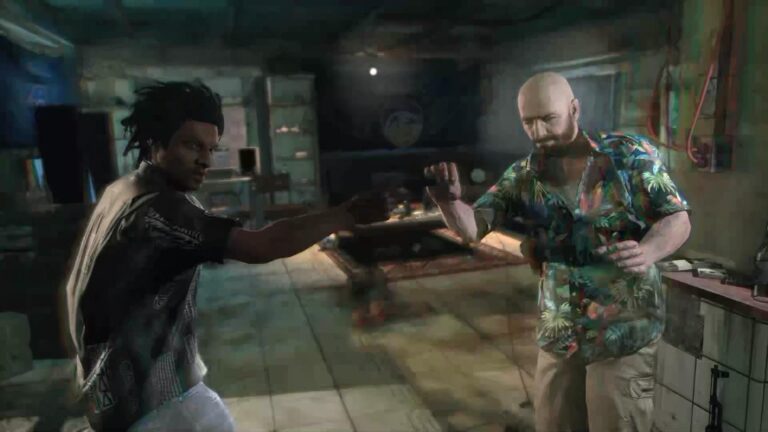
Chapter 6 of Max Payne 3 follows Max Payne as he fights off heavily armed attackers who storm the Branco corporate offices. Players must navigate through office rooms, a boardroom, and the lobby while defending an IT employee, meeting with Rodrigo, and eventually escaping a collapsing building.
The chapter features eight collectibles, including three Golden MD-97L weapon parts and five distinct clues hidden throughout the environment. Players can also unlock the “Amidst the Wreckage” achievement by finding and destroying five architectural models located within the boardroom area.
“A Dame, A Dork, and A Drunk” is the sixth chapter of Max Payne 3 and the first chapter of Act Two. After the failed rescue attempt in the previous chapter, Max and his employers return to the Branco offices. Their meeting is interrupted when heavily armed attackers storm the building.
There are 8 collectibles in this chapter: 3 Golden MD-97L parts and 5 Clues. The chapter also contains the Amidst the Wreckage achievement/trophy, which requires you to destroy all five architectural models in the boardroom. (supercheats.com, gamefaqs.gamespot.com)
[IMAGE HERE]
Survive the Office Attack
Max starts the chapter inside the Branco offices, but there is almost no time to prepare. Armed attackers immediately storm the room.
Use Shootdodge to deal with the first enemies and then get behind one of the desks for cover. Watch your sides carefully, as enemies can approach from several directions.
Once the first wave is down, search the offices before following the IT employee.
Clue 1 – Rodrigo’s Email
After the first firefight, turn around and enter the small office on the right side.
There is a laptop sitting near the desk. Interact with it to read Rodrigo’s Email.
[IMAGE HERE]
Clue: Rodrigo’s Email (gamesradar.com)
Clue 2 – File on Fabiana
Stay inside the same office.
On the desk next to the laptop is a folder containing information about Fabiana. Examine it to collect the second clue.
[IMAGE HERE]
Clue: File on Fabiana
Both clues are in the same office, so make sure you collect them before moving on. (vgfaq.com)
Golden MD-97L Part 1
Leave the office and enter the adjacent office across the way.
Look behind the desk in the corner. The first piece of the Golden MD-97L is lying on the floor.
[IMAGE HERE]
Collectible: Golden MD-97L – Part 1/3 (gamesradar.com)
Once you have it, regroup with the IT employee and continue toward the conference room.
Enter the Boardroom
The next area is the large conference room. As soon as you enter, several enemies attack.
Use Bullet Time to quickly take out the most dangerous targets before they find better cover. Once the room is clear, search it carefully before leaving.
Clue 3 – Architectural Models
Look for the architectural models around the center of the boardroom.
One of the models, including the blue-green building with a helicopter on top, can be examined for the Architectural Models clue.
[IMAGE HERE]
Clue: Architectural Models (gamesradar.com)
Amidst the Wreckage
Before leaving the boardroom, destroy all five architectural models.
There are five models in total: two on the left side of the room, two on the meeting table, and one on the counter near the entrance.
[IMAGE HERE]
Make sure all five are destroyed before progressing. If enemies destroy one for you, the achievement may not count, so it is safest to clear the room first and then destroy the models yourself. (gamefaqs.gamespot.com, supercheats.com)
Help the IT Employee
Leave the boardroom and enter the next office.
More enemies will attack while the IT employee attempts to reach the server room. Stay behind solid cover and watch for grenades, as the office layout makes it easy for enemies to flank you.
Once the fight is over, continue following the IT employee.
After the security system is restored, Max is able to move deeper into the building.
[IMAGE HERE]
Meet Rodrigo
Head toward Rodrigo’s office and a cutscene will play.
After speaking with Rodrigo, you’ll have to retrace your steps through the building.
Before leaving the area, take care of the next collectible.
Golden MD-97L Part 2
As soon as the conversation with Rodrigo ends, turn around.
Near the small decorative waterfall, you’ll find the second Golden MD-97L part lying on the ground.
[IMAGE HERE]
Collectible: Golden MD-97L – Part 2/3 (vgfaq.com)
Pick it up before heading into the hallway.
Clue 4 – School Pictures
Follow the long hallway toward the next area.
On the right wall, look for three framed school photographs.
Examine them to collect the fourth clue.
[IMAGE HERE]
Clue: School Pictures (gamesradar.com)
Continue through the hallway after collecting it.
The Lobby Ambush
As Max enters the lobby, a vehicle suddenly smashes through the entrance.
Immediately focus on the driver and kill him before dealing with the other attackers.
More enemies will pour into the lobby, including a heavily armored gunner. Use the available cover and concentrate your fire on exposed enemies before dealing with the tougher target.
[IMAGE HERE]
Once the lobby is clear, search the area before heading toward the elevator.
Golden MD-97L Part 3
Look for the glass-encased architectural model near the wall.
Break the glass and collect the final Golden MD-97L part.
[IMAGE HERE]
Collectible: Golden MD-97L – Part 3/3 (gamesradar.com, vgfaq.com)
That completes the Golden MD-97L for Chapter 6.
Reach the Elevator
Once you’ve collected the final part, head toward the elevator.
After the cutscene, Max finds himself in a badly damaged section of the building.
The path ahead is largely scripted, so keep moving forward and follow the prompts as Max works his way through the wreckage.
[IMAGE HERE]
Escape the Collapsing Building
Max eventually reaches a flooded section of the building.
Move forward carefully and watch for falling debris. The area is dangerous, and there are no easy opportunities to stop and recover.
Continue until you reach the roller door.
A surviving enemy appears, giving you a chance to practice the disarm mechanic.
Disarm him and move forward.
Clue 5 – Dead IT Guy
Immediately after the disarm sequence, look at the body lying on the ground.
It belongs to the IT employee who helped Max earlier in the chapter.
Examine the body to collect the final clue.
[IMAGE HERE]
Clue: Dead IT Guy (gamesradar.com, vgfaq.com)
This is the last collectible in Chapter 6.
Fight Through the Wreckage
Continue forward after finding the body.
Two enemies will attack around the corner. Use Bullet Time if necessary, as Max has very little room to work with.
Keep moving as the building continues to collapse around you.
Eventually, another group of enemies appears behind the doors ahead.
[IMAGE HERE]
Clear the room and continue toward the next section.
Push the Cabinet
After another short cutscene, Max reaches a blocked path.
Walk up to the cabinet and complete the quick-time sequence to push it over. This creates a temporary bridge that allows Max to cross the damaged section of the building.
An explosion knocks Max down shortly afterward.
[IMAGE HERE]
Keep moving forward along the linear path until the next cutscene begins.
The chapter ends as Max finally escapes the collapsing building.
Chapter 6 Collectibles Checklist
Golden MD-97L
- Golden MD-97L Part 1
- Golden MD-97L Part 2
- Golden MD-97L Part 3
Clues
- Rodrigo’s Email
- File on Fabiana
- Architectural Models
- School Pictures
- Dead IT Guy
Achievement/Trophy
- Amidst the Wreckage – Destroy all five architectural models in the boardroom.